Numerous individuals have expressed a desire for clear instructions on effectively implementing Codeigniter 4 Shield for Authentication with Multirole Management. Despite the abundance of tutorials available, most of them only touch upon authentication and provide minimal information regarding authorization.
We will be covering a few important points when dealing with Shield.
- Authentication
- Authorization with Multirole
What is authentication?
Authentication is a process to acknowledge that the user exists. In the authentication, the plugins will perform all the necessary such as initiating session
Once the session has been initiated, you will be able to use the auth helper.
// get the current user
auth()->user();
// get the current user’s id
auth()->id();
// or
user_id();
// get the User Provider (UserModel by default)
auth()->getProvider();
This is the part when things will be really interesting
Step by step to use shield
Step 1:
composer require codeigniter4/shield
Could not find a version of package codeigniter4/shield matching your minimum stability (stable).
Require it with an explicit version constraint allowing its desired stability.
composer config minimum-stability dev
composer config prefer-stable true
Step 2:
Configure app\Config\Auth.php
public array $redirects = [
‘register’ => ‘/’,
‘login’ => ‘student’,
‘logout’ => ‘login’,
‘force_reset’ => ‘/’,];
It is important to redirect your user once they have registered or login.
Step 3:
Now we have to configure app\Config\Filters.php
public array $aliases = [
‘csrf’ => CSRF::class,
‘toolbar’ => DebugToolbar::class,
‘honeypot’ => Honeypot::class,
‘invalidchars’ => InvalidChars::class,
‘secureheaders’ => SecureHeaders::class,// shield
‘session’ => \CodeIgniter\Shield\Filters\SessionAuth::class,
‘auth-rates’ => \CodeIgniter\Shield\Filters\AuthRates::class,
‘group’ => \CodeIgniter\Shield\Filters\GroupFilter::class,
‘permission’ => \CodeIgniter\Shield\Filters\PermissionFilter::class,];
public array $globals = [
‘before’ => [
// ‘honeypot’,
// ‘csrf’,
// ‘invalidchars’,‘session’ => [‘except’ => [‘/’,’home’,’about’,’class’,’registerstudents’,’login*’, ‘register’, ‘auth/a/*’]],
],
‘after’ => [
‘toolbar’,
// ‘honeypot’,
// ‘secureheaders’,
],];
public array $filters = [
‘auth-rates’ => [
‘before’ => [
‘login*’, ‘register’, ‘auth/*’
]]
];
In the $globals we have allowed the user to accept all the following links. Unless you have a specific link you would not grant access unless authenticated you must not include into it
Step 4
Not to forget the routes you have \app\Config\Routes.php
I control the access to certain pages by controlling the route. Only the admin able to access the admin dashboard.
$routes->get(‘student’,’Home::studentdashboard’);
$routes->get(‘admin’, ‘Home::admindashboard’, [‘filter’ => ‘group:admin’]);
Step 5 (VIEW)
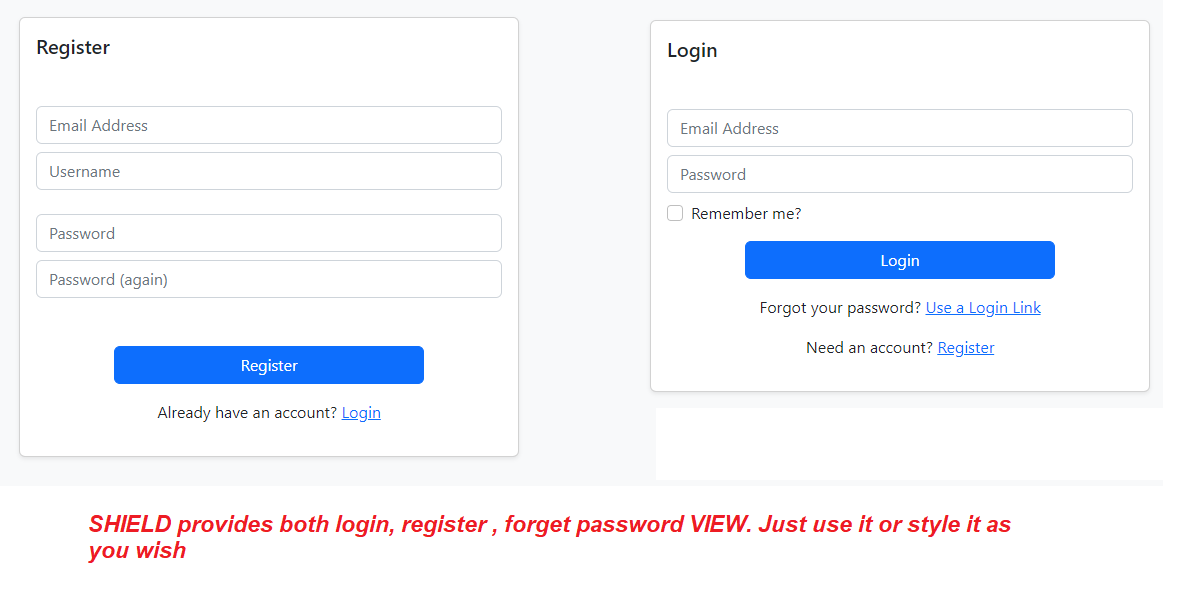
As for the view and controller, since we shield, we are able to use Pre-generated Views
- Login
- Logout
- Register
- Forget password.
This is what I love about SHIELD, it does everything for you.

You can style the Views by accessing the following folders \vendor\codeigniter4\shield\src\Views
Step 6:
AS for the CONTROLLER
public function admindashboard(){
echo ‘admin dashboard’;
}
public function studentdashboard(){
echo ‘student dashboard’;}
}

